A photo straight from a phone is usually far bigger than a web page needs. It might be several megabytes, while the slot it will appear in could show it at a fraction of its captured size. Compression is how you close that gap. Done well, the file shrinks dramatically and nobody looking at the image can tell. Done badly, you get banded skies, fuzzy edges and text that looks smudged.
This guide explains what image compression actually does, what the quality setting trades away, and how to compress an image with the free Image Compressor on Ovatly, which runs in your browser and never uploads your image. It also covers the honest limit of the whole exercise: for the formats most people use, compression is lossy, so "no visible loss" is the realistic goal, not "no loss at all".
Contents
- Quick answer
- What compression actually does to an image
- Lossy and lossless, in plain terms
- The three levers: quality, format and dimensions
- How to compress an image, step by step
- Worked example: a 63.2 KB image at 80 percent quality
- When quality loss becomes visible
- Limitations and alternatives
- Common mistakes
- Troubleshooting
- FAQs
- Conclusion
- References
Quick answer
To compress an image without visible quality loss: keep the dimensions your use actually needs, save photos as JPEG or WebP at a quality setting around 75 to 85 percent, and compare the result preview against the original at full size before you use it. On Ovatly, open the Image Compressor, add your JPG, PNG or WebP image, set the quality slider, choose JPEG or WebP as the output format, and download the result. The tool shows you the before and after file sizes, and because it works in your browser, the image is not uploaded anywhere. Expect large savings on photos; expect visible damage if you push the quality slider too low or compress an already-compressed file again and again.
What compression actually does to an image
An uncompressed image stores a colour value for every pixel: a 1600 by 1000 image has 1.6 million of them, so plain storage takes several megabytes. Compression exploits two facts: neighbouring pixels are usually similar, so the data contains repetition that can be stored more efficiently; and human eyes are insensitive to some fine colour detail, so a format can discard a controlled amount of it unnoticed.
How much an image shrinks depends on its content: a detailed forest photo compresses less than a flat graphic. There is no honest universal figure, which is why a good tool shows you the real before and after numbers for your own file instead of promising a percentage in advance.
Lossy and lossless, in plain terms
Lossless compression shrinks a file without discarding anything. Open the file and you get back every original pixel. PNG works this way. It is the right choice when every pixel matters, and for graphics with flat colours and sharp edges it can be very efficient, but photographs saved losslessly stay relatively large.
Lossy compression discards some information permanently in exchange for much smaller files. JPEG works this way. WebP needs a careful sentence: the WebP format supports both a lossy and a lossless mode, but Ovatly's compressor uses your browser's built-in image encoder, and its WebP output is the lossy kind, so treat every output of this tool (JPEG or WebP) as lossy. The art is in choosing how much to discard. At sensible settings, what is discarded is detail your eye would struggle to see at normal viewing sizes. At aggressive settings, the discarding becomes visible as blocky patches, halos around edges and banding in gradients such as skies.
One consequence follows: never treat a lossy output as your master copy. Keep the original file, and compress a copy for the specific use. Re-compressing an already lossy file discards more detail each time, a problem sometimes called generation loss.
The three levers: quality, format and dimensions
The quality setting is the main lever. On a typical 0 to 100 scale, settings around 75 to 85 are the working range for photographs on the web: much smaller files than 95 or 100, with differences that are hard to spot at the size the image will actually be displayed. Below roughly 60, artefacts usually become easy to see. These are guidelines from how the formats behave, not guarantees; the only reliable test is looking at your own result.
The format is the second lever. JPEG is understood everywhere and suits photographs. WebP generally produces smaller files than JPEG at comparable quality and is supported by all modern browsers, which makes it a good default for websites. PNG is lossless, so it stays larger for photos, but it is the right choice for screenshots, diagrams and anything with crisp text or flat colour, where JPEG artefacts are most visible.
Dimensions are the third lever, and often the biggest one. An image displayed 800 pixels wide does not need to be 4000 pixels wide. Note that Ovatly's Image Compressor does not change dimensions; it re-encodes at the size your image already is. When you need different pixel dimensions, resize first with the Image Resizer, then compress.
How to compress an image, step by step
- Open the Image Compressor. The tool loads with an empty file box and the quality slider at its 80 percent default.
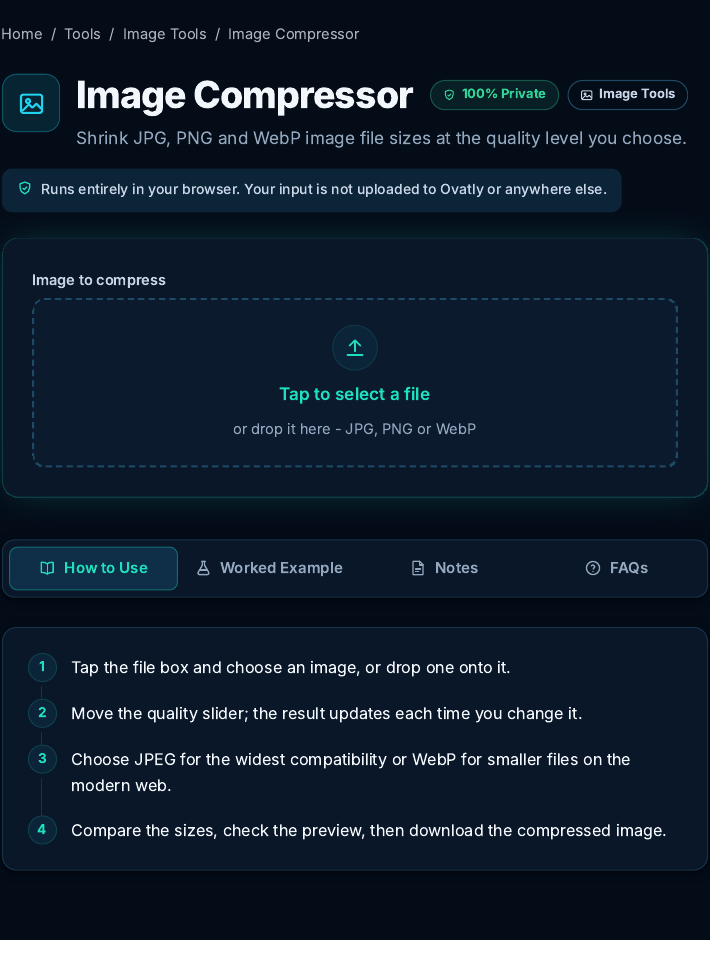 The compressor before an image is added. Screenshot: genuine capture from the live Ovatly staging website, 9 November 2026.
- Add your image by tapping the file box or dropping the file onto it. The tool accepts JPG, PNG and WebP images. Compression starts automatically; there is no separate compress button.
- Read the result panel. It shows the size before and after, and how much smaller the file became in percent.
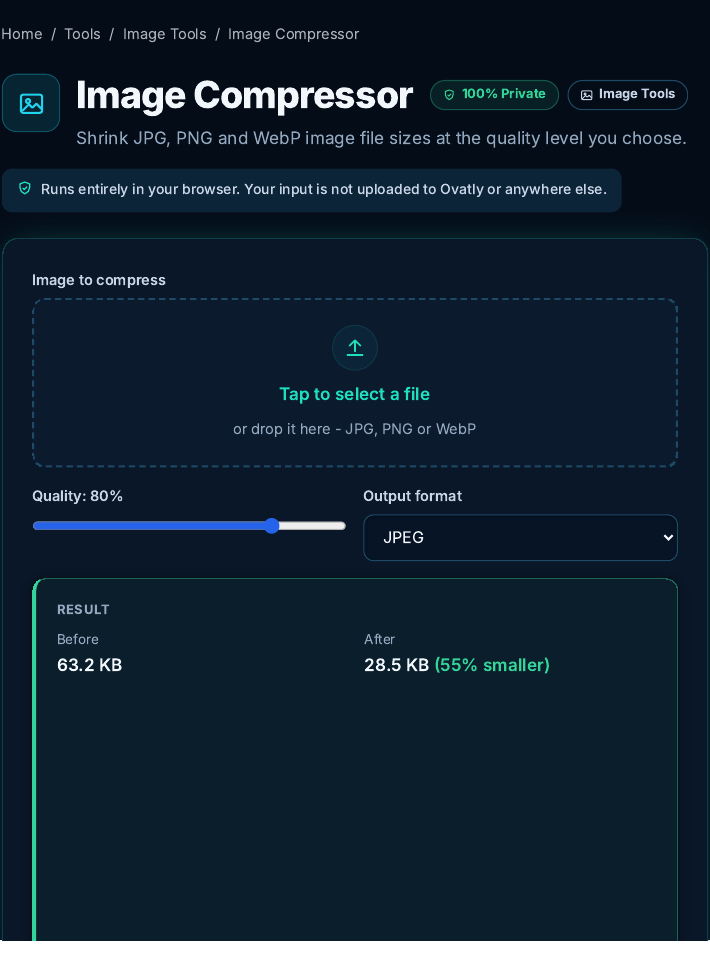 The result panel for the worked example below. Screenshot: genuine capture from the live Ovatly staging website, 9 November 2026.
- Adjust if needed. Move the quality slider and the result updates: higher quality means a larger file with less discarded detail, lower quality means the opposite. Switch the output format between JPEG and WebP and compare which gives you the smaller file for this image.
- Check the preview against your original at full size, especially any skies, faces and text. If it looks clean at the size it will be used, download the compressed image. If you see banding or smearing, raise the quality and compare again.
Worked example: a 63.2 KB image at 80 percent quality
For this guide we compressed a real test image with the tool on the staging website: a simple landscape illustration saved as a JPEG, 1600 by 1000 pixels, 64,757 bytes on disk, which the tool displays as 63.2 KB.
At the default settings, quality 80 percent and JPEG output, the tool produced a file of 28.5 KB and reported it as 55 percent smaller. The dimensions were unchanged, as the tool does not resize. The illustration has large flat areas, which compress well; a detailed photograph of the same pixel size would normally save less, and the tool would show you its true figures in the same panel.
The useful habit this example shows is not the percentage. It is that the decision takes seconds: read the two numbers, look at the preview, and only then decide whether to accept the quality setting or move it.
When quality loss becomes visible
Loss stays invisible while the discarded detail is finer than what the display shows. It becomes visible in predictable places: smooth gradients such as a dusk sky break into bands, sharp edges such as dark text grow faint halos, and dense detail such as hair or foliage turns mushy. All of it worsens each time a lossy file is re-saved.
Two defences cover most cases. Judge the result at the size it will actually be seen; an artefact invisible in a phone-sized slot does not matter. And for precision images (screenshots, diagrams, small text), do not rely on this tool's outputs at all: both its JPEG and its WebP output are lossy, so preserve the original PNG, which is the lossless copy.
Limitations and alternatives
The Image Compressor handles one image at a time and works with JPG, PNG and WebP. It does not resize, crop or convert between every format pair; the wider Image Tools category covers resizing and conversion jobs. Very large images are processed on your own device, so an old phone may take a moment, and as with every browser tool here, closing the tab discards the work.
If an image must stay pixel-perfect (archival copies, print work, evidence, screenshots whose text must stay exact), do not send it through this compressor at all: its outputs are lossy in both formats it offers. Preserve the original PNG, which is lossless, as your master, and compress only the copies you publish. If a platform imposes a strict upload limit in megabytes, work backwards from that limit, lowering quality in small steps until the file fits with acceptable preview quality.
Common mistakes
- Compressing the only copy. Always keep the original; lossy compression cannot be undone.
- Compressing an already compressed file. Each lossy save discards more. Start again from the original instead.
- Judging at the wrong size. Artefacts that vanish at display size do not matter; artefacts visible at display size do.
- Using JPEG for text-heavy screenshots. Text edges are where lossy damage shows first. For screenshots and graphics that must stay pixel-perfect, keep and use the original PNG rather than this compressor's JPEG or WebP output.
- Chasing the smallest possible file. Below a sensible quality floor, the saving is small and the damage is obvious.
Troubleshooting
The compressed file is barely smaller. The image may already be well compressed, or mostly flat and simple. Try WebP output, and check whether the dimensions are far larger than the slot needs; resizing first often saves more than quality changes.
The result looks worse than expected. Raise the quality setting and compare again. If the image contains gradients or text, switch format as described above.
The tool seems slow. Large photos are encoded on your device. Give it a few seconds, and avoid running several heavy tabs at once on a low-power device.
FAQs
Is my image uploaded to Ovatly for compression? No. The compression happens in your browser using its built-in image encoding; the implementation was checked for this guide and contains no upload of your image. The tool page states the same on its privacy line.
What quality setting should I use? For photographs on the web, start at the 80 percent default and judge the preview. Move up for hero images that fill a screen, down only when a hard size limit forces it.
Will compression change my image dimensions? Not in this tool. It re-encodes at the existing pixel size. Use the Image Resizer when you need different dimensions.
Can compression make a file bigger? Occasionally, for tiny or already efficient files, re-encoding can match or slightly exceed the original. The result panel shows both numbers, so you can simply keep whichever file is smaller.
Is WebP always better than JPEG? WebP usually wins on size for the modern web, but JPEG remains the safest choice when a file must open in older software or be sent to systems you do not control.
Conclusion
Good compression is a comparison, not a leap of faith: keep your original, work at the dimensions and format your use requires, start near 80 percent quality, and let the before and after numbers plus your own eyes make the call. The Image Compressor keeps that loop quick and private, because the work happens on your device. For a page full of images, the same routine pairs well with the Image Resizer for dimensions and, when you publish, with a quick check of the finished page using the tools in the Website Tools category.
Related guide: How to Add Watermarks to Photos.
References
- MDN Web Docs, on image file types and the lossy and lossless formats browsers support: https://developer.mozilla.org/en-US/docs/Web/Media/Guides/Formats/Image_types
- web.dev (Google), on image optimization and serving images efficiently on the web: https://web.dev/fast/#optimize-your-images